Tuesday, 29. April 2008
Tutorial: Seam allowance in Inkscape
kiddl-ond-hoas, 01:06h
In this tutorial I will show you an automated but simple way to add seam allowance to
the outline of a patten piece in inkscape.
Since Inkscape is very similar to Adobe Illustrator, this should also work with it.
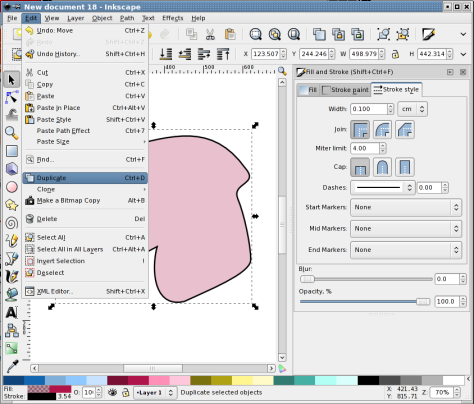
You can use the Shortcut [Ctrl-D] or choose "Edit --> Duplicate" from the menu.
If your seam allowance will be 15mm, you need to select 3cm as stroke with.
Select "Object --> Fill and Stroke" from the menu.
Your image may look a little bit strange now, but don't worry we will fix that soon.
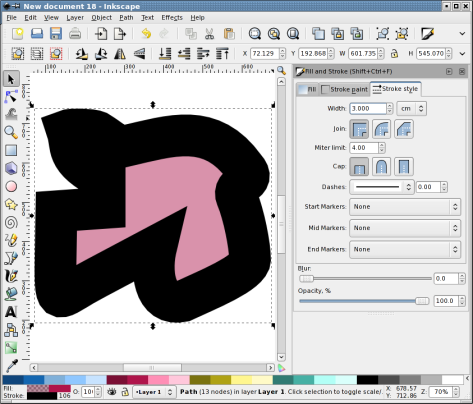
(you can change the fill colour the new object to check whether everything worked OK)
Change the stroke where to seam to dotted.
Now your done.
the outline of a patten piece in inkscape.
Since Inkscape is very similar to Adobe Illustrator, this should also work with it.
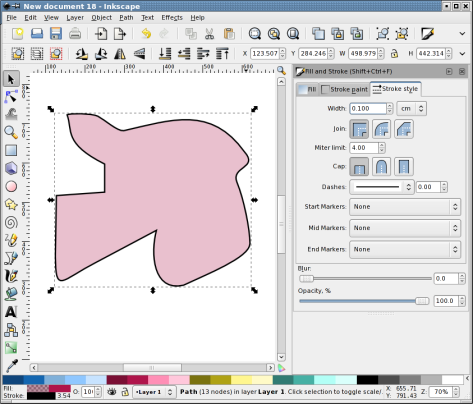
Step 1: Draw your pattern without seam allowance
Lets assume you constructed (or traced from an existing piece of clothing) a pattern in inkscape.Step 2: Duplicate your outline
We need 2 identical copies of the outline (one for the line where to cut and one for the line where to sew).You can use the Shortcut [Ctrl-D] or choose "Edit --> Duplicate" from the menu.
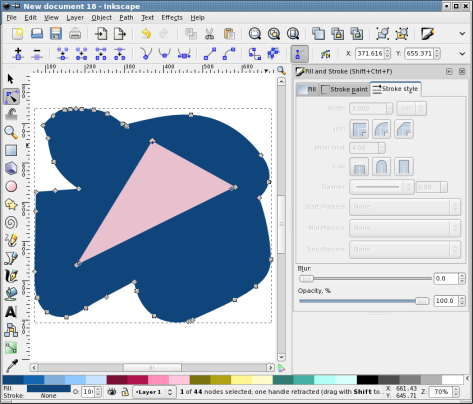
Step 3: Increase stroke width
Now increase the stoke width of one of the copies to 2 times the width of your seam allowance.If your seam allowance will be 15mm, you need to select 3cm as stroke with.
Select "Object --> Fill and Stroke" from the menu.
Your image may look a little bit strange now, but don't worry we will fix that soon.
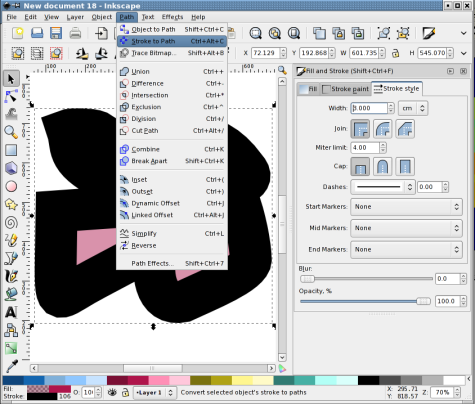
Step 4: Stroke to Path
Now select from the menu "Object -> Stroke to path" to make this 3cm stroke to a regular path with filling. (Shortcut: [Ctrl-Alt-C])(you can change the fill colour the new object to check whether everything worked OK)
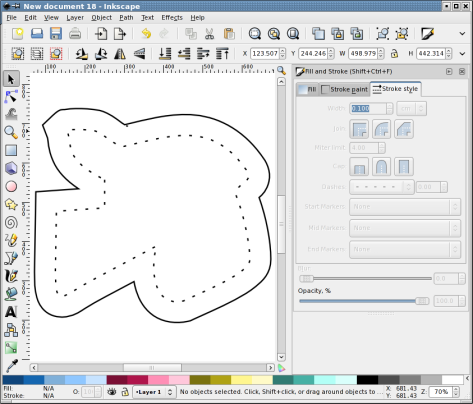
Step 5: Delete inner points
Now select the "Edit path by node" tool (Shortcut: [F2]) and remove the inner points by selecting them and pressing the [Del] key.Step 6: Set fill and stroke
Now change the fill of this object to transparent and the stroke to 1mm black.Change the stroke where to seam to dotted.
Now your done.
... link (0 Kommentare) ... comment
